I’ve been talking about all things wedding on a couple of my previous posts, and I can’t believe how fast the big day/weekend is approaching. Almost everything is set, and I wanted to show you a tutorial on DIY wedding invitations.You know how expenses really start adding up when planning a wedding, so I decided to make my own. It’s really easy and inexpensive, and most of all it’s a personal touch. Here’s the step by step process. All of my materials were purchased at Michael’s Craft Stores.You can also view the “How to” video. Happy DIYing!
He estado publicando mucho sobre mi boda últimamente y no puedo creer cuán rápido se está acercando la fecha! Ya casi está todo listo y quería mostrarles un tutorial para construir sus propias invitaciones. Ya saben como se pueden acumular los gastos durante la planificación de una boda, así que tomé la decisión de hacer las invitaciones yo misma. Es bien económico y ademós le da un toque especial y personal. Aquí les muestro, paso a paso cómo hacerlo. Todos mis materiales fueron adquiridos en Michael’s Craft Stores. También pueden ver el video del proceso.
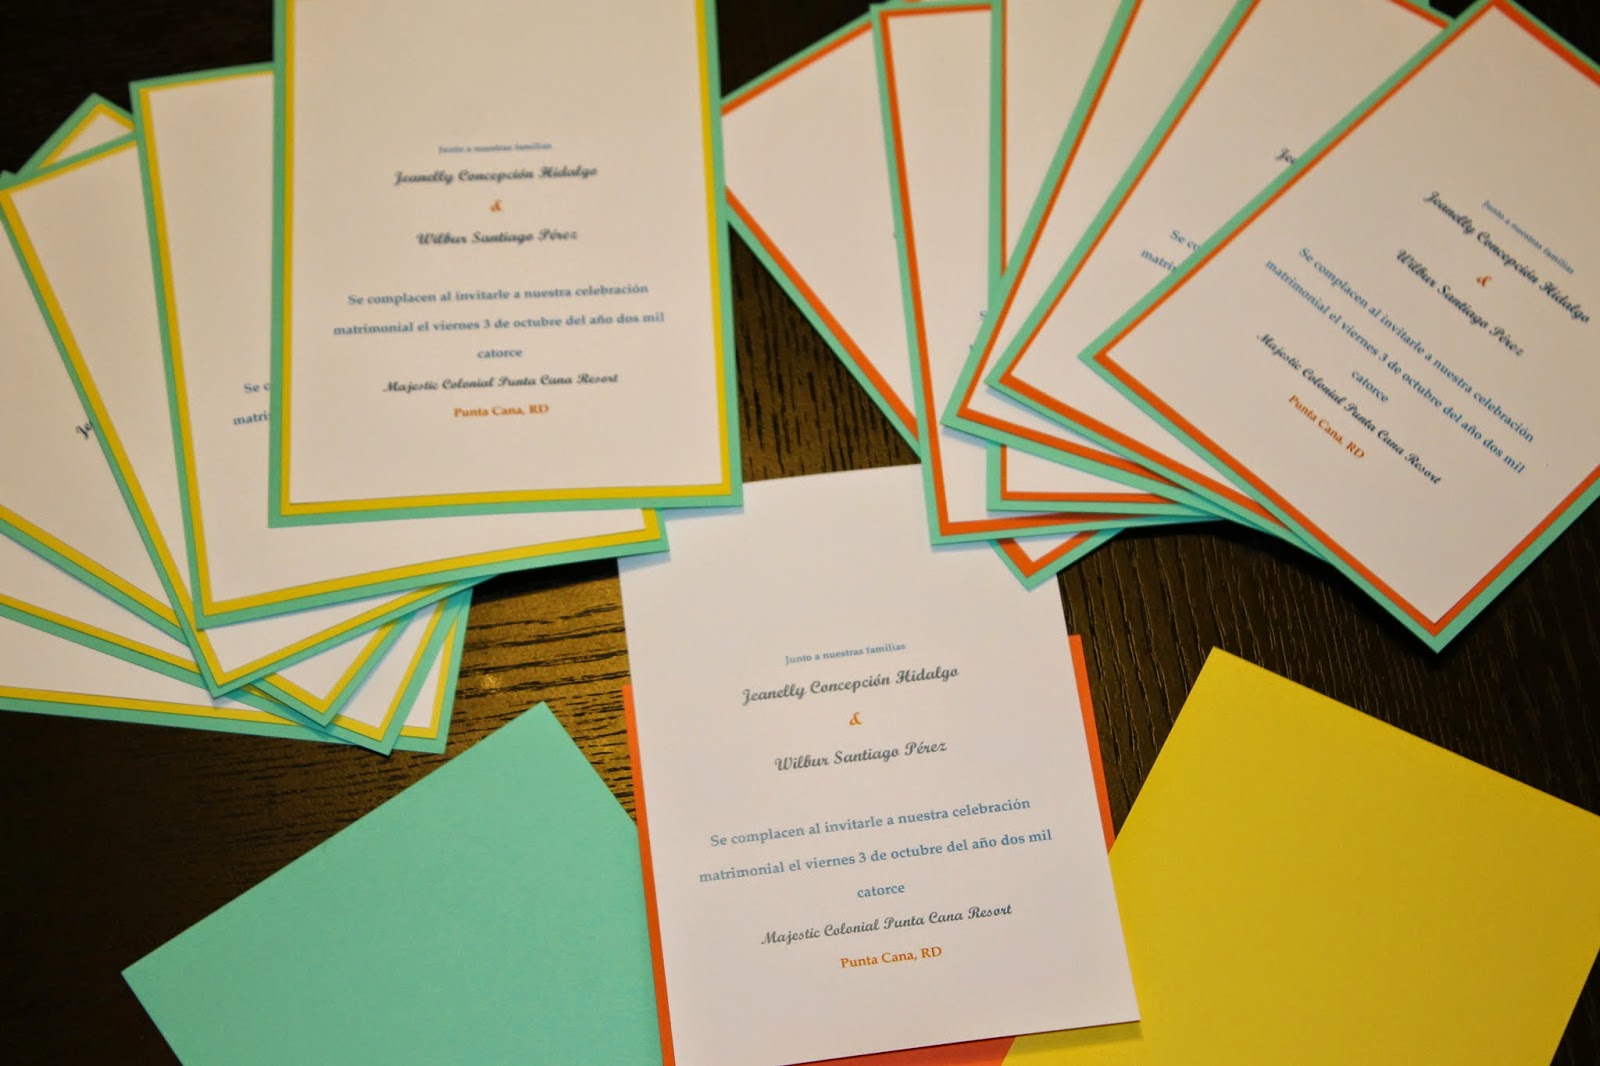
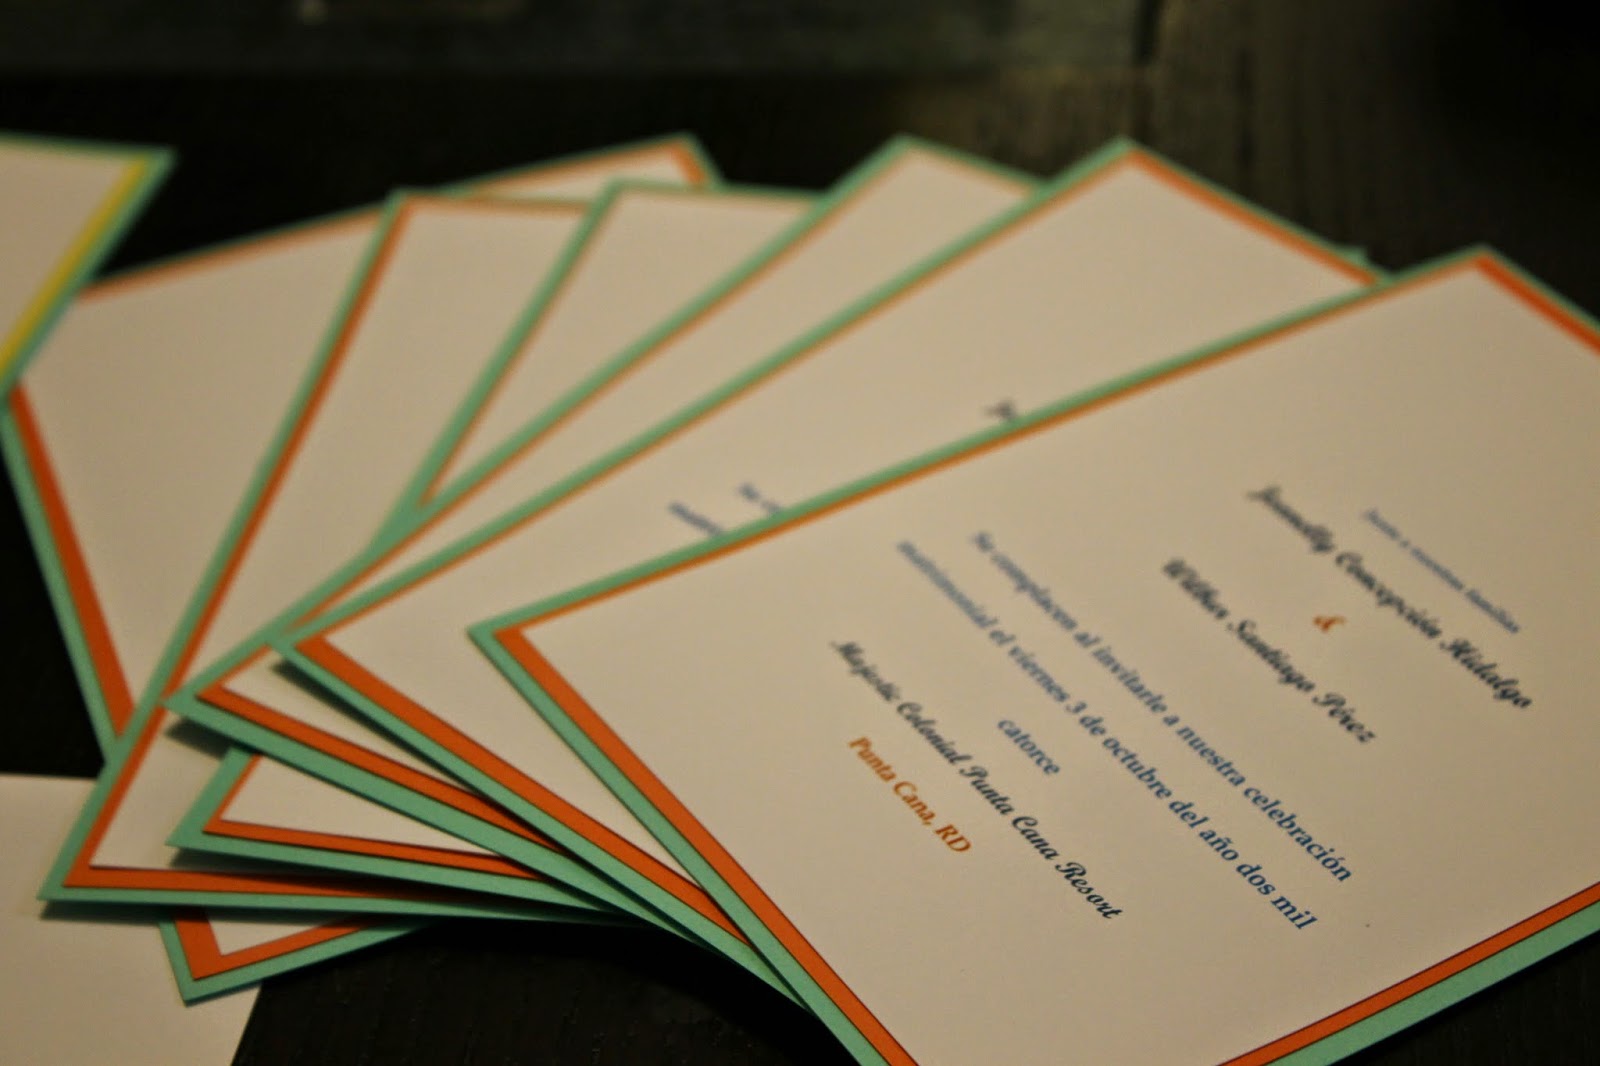
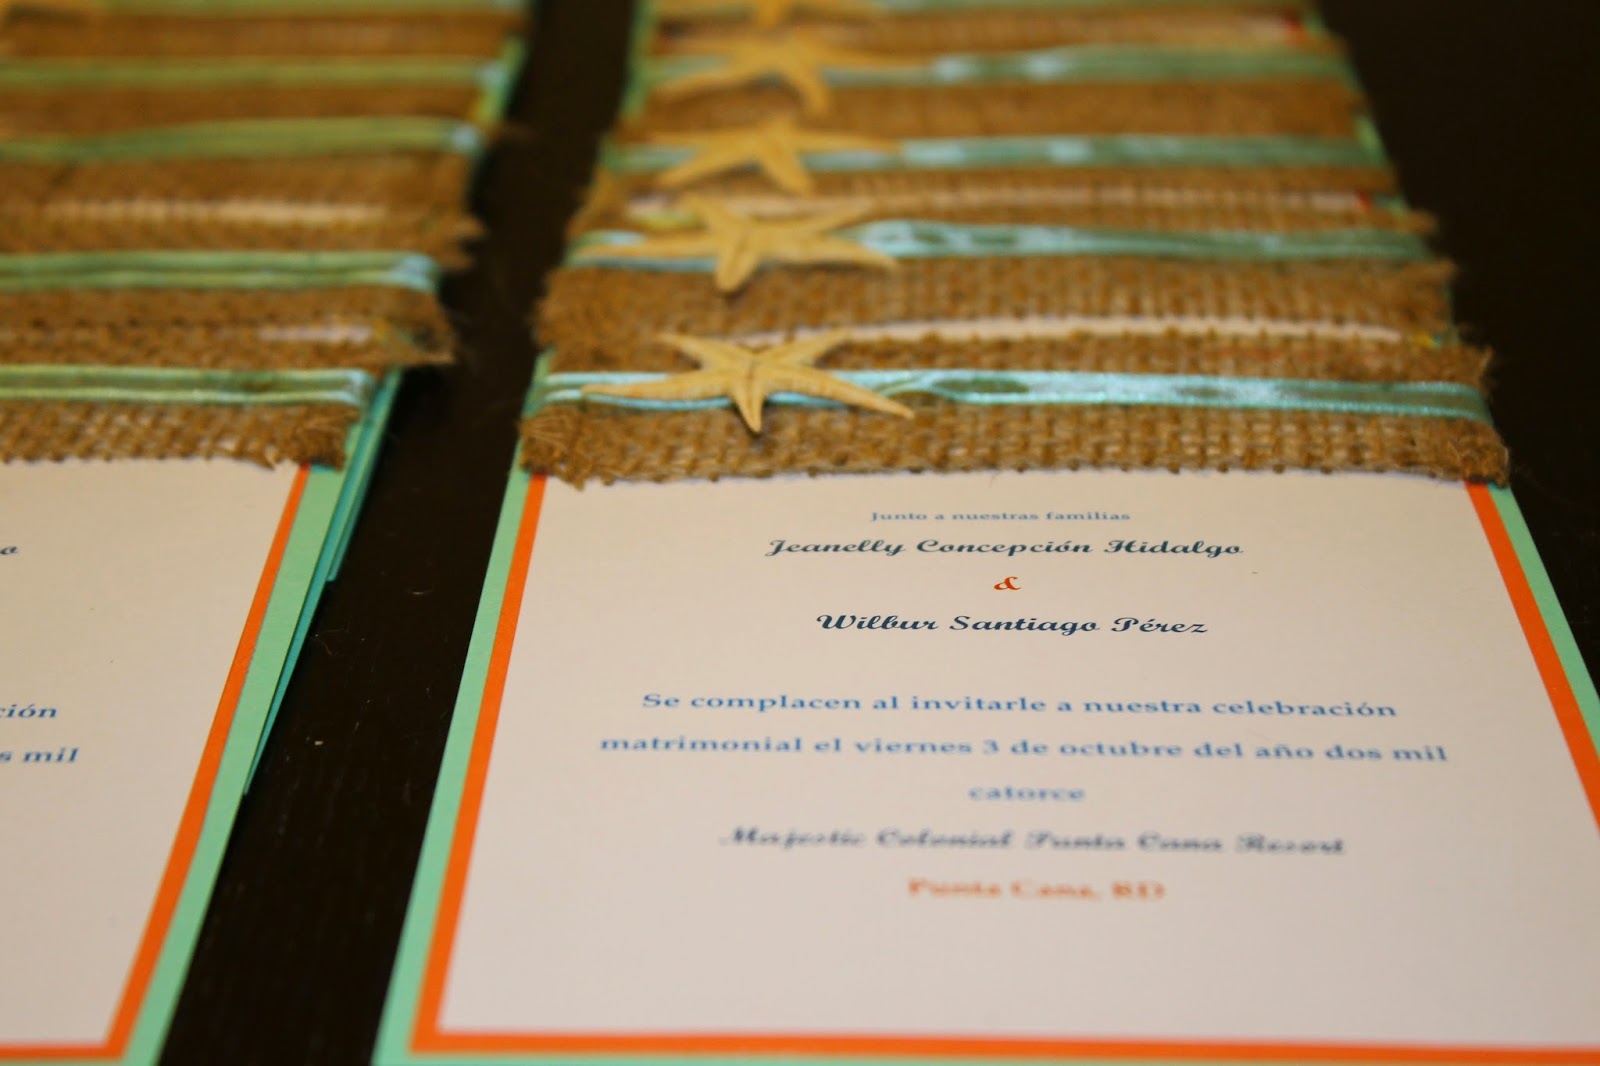
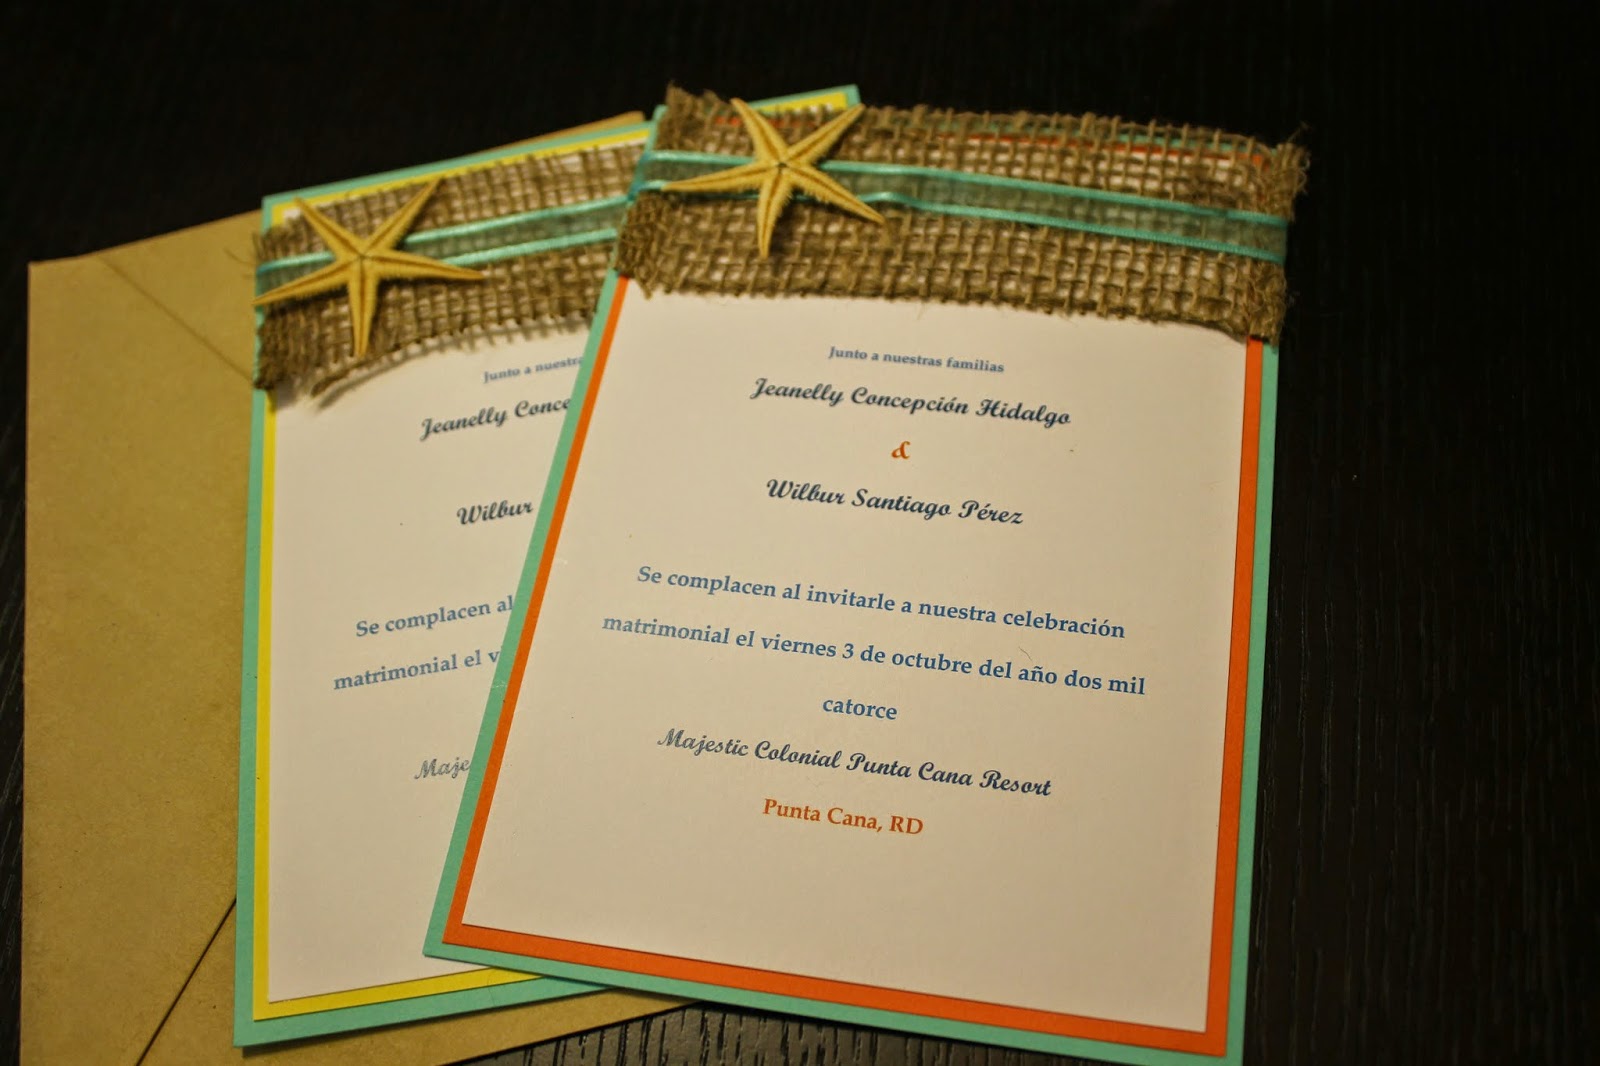
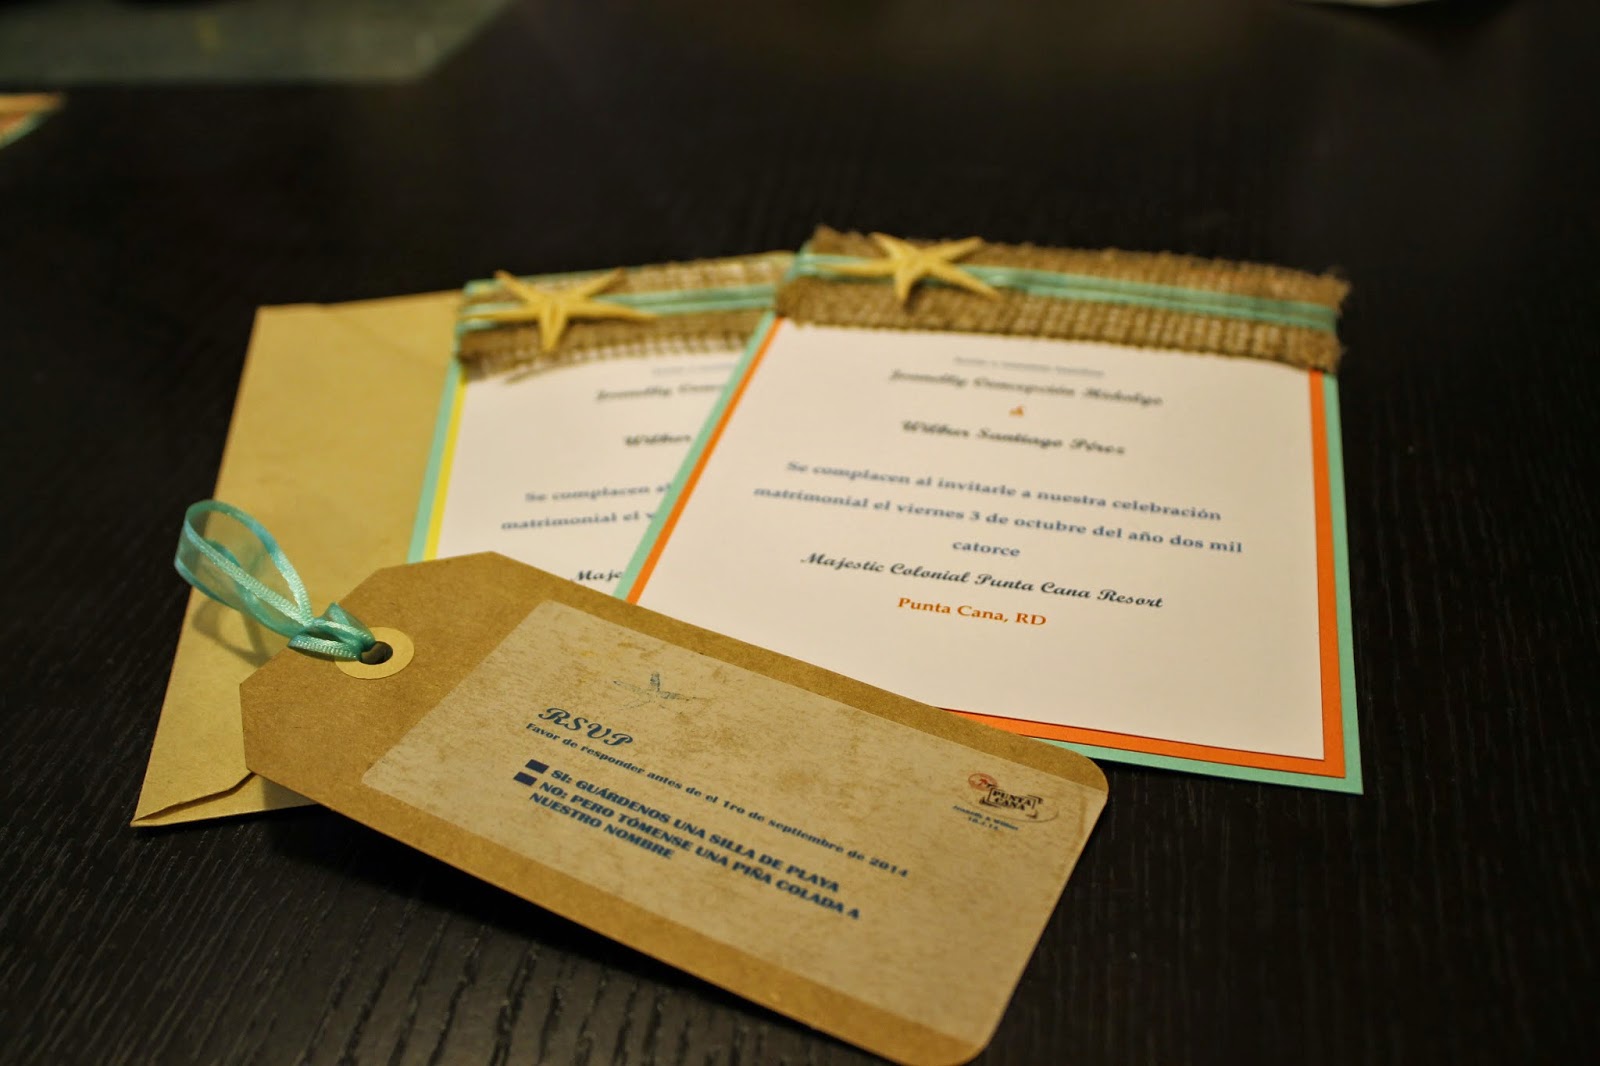
1. Print out the invitation wording on Card Stock and cut to desired size. I used 4 1/2 x 6 1/2 card stock in white. I got it printed at Office Max for only $10, using a discount the company I work for offers for employees. Check to see if your employer provides these kinds of benefits. Otherwise, you can print at home or office.
{Imprime la parte escrita de la invitación en papel de cartulina y recorte al tamaño deseado. Yo utilicé cartulina de 4 1/2″ x 6 1/2″ en blanco y lo imprimí en Office Max por solo $10 con un descuento que ofrece mi compañía para sus empleados. Verifique con su patrono a ver si tiene descuentos similares, de lo contario imprima en su casa u oficina.}
2. Cut the colored card stock for layering effects. I used a paper cutter. Office Max also provides the service for a small cost.
{Recorte la cartulina de colores y recorte para crear el efecto de capas. Yo utilicé un cortador industrial, pero Office Max también provee ese servicio por un bajo costo}
3. Glue layers together. Make sure they align.
{Una las partes con pegamento. Asegúrese de que estén alineadas)
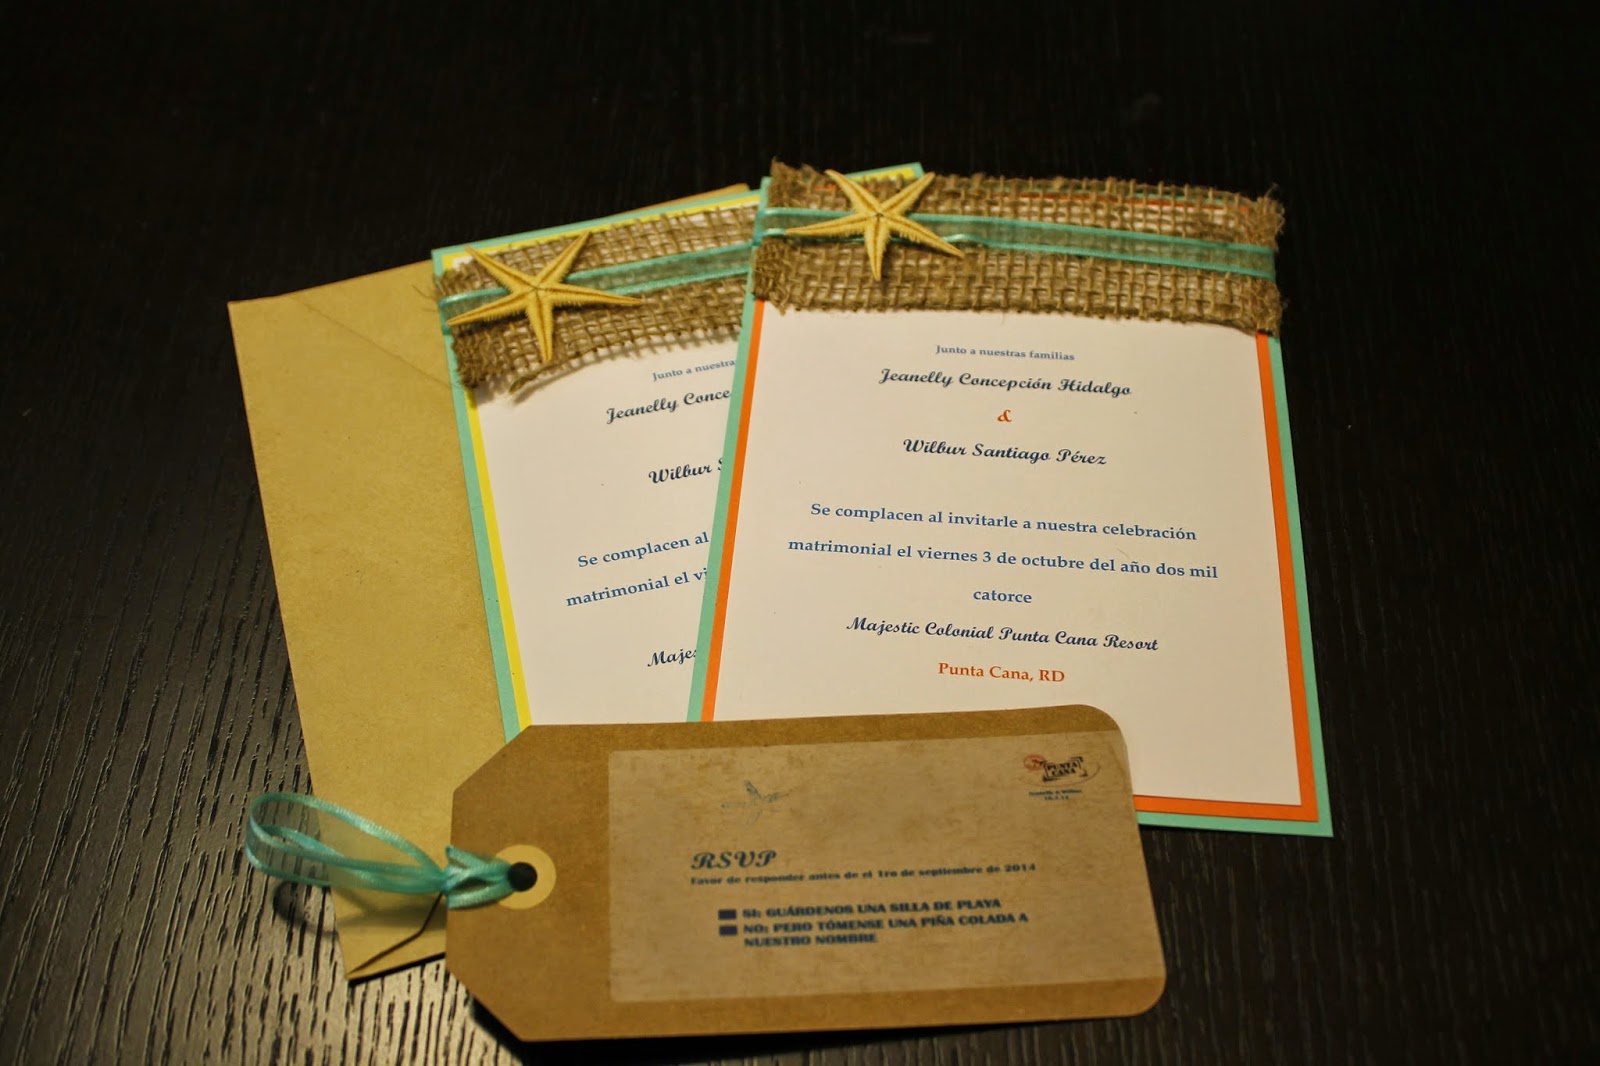
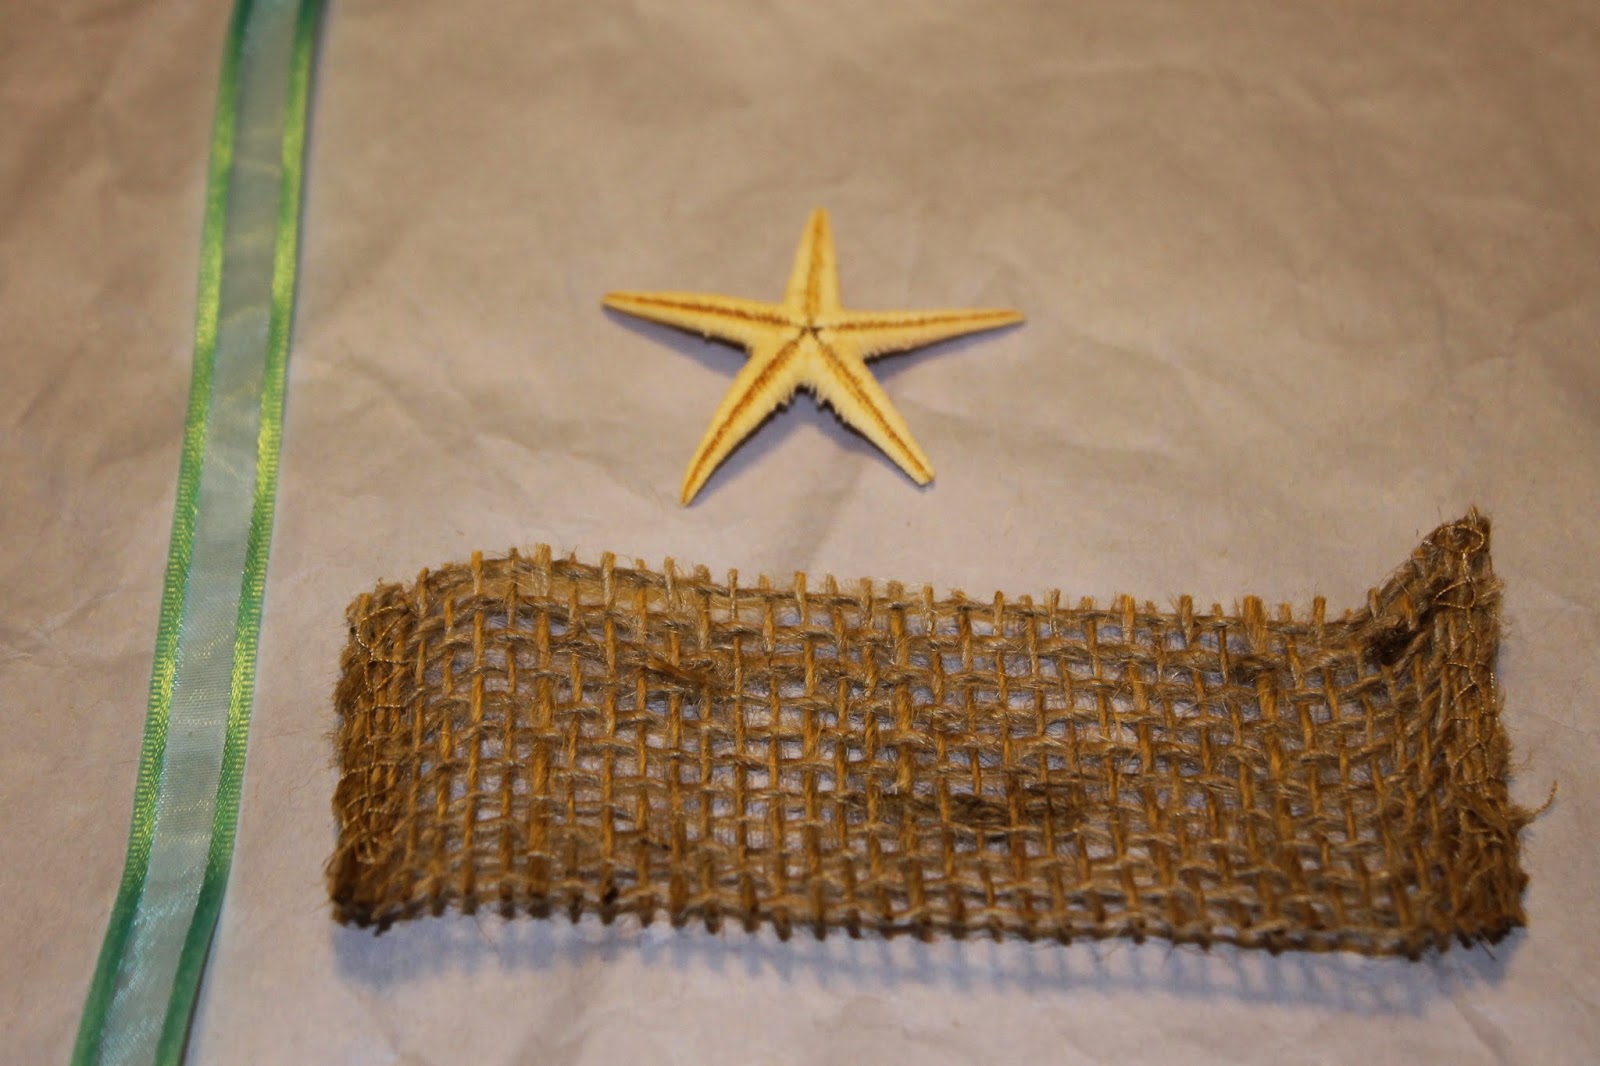
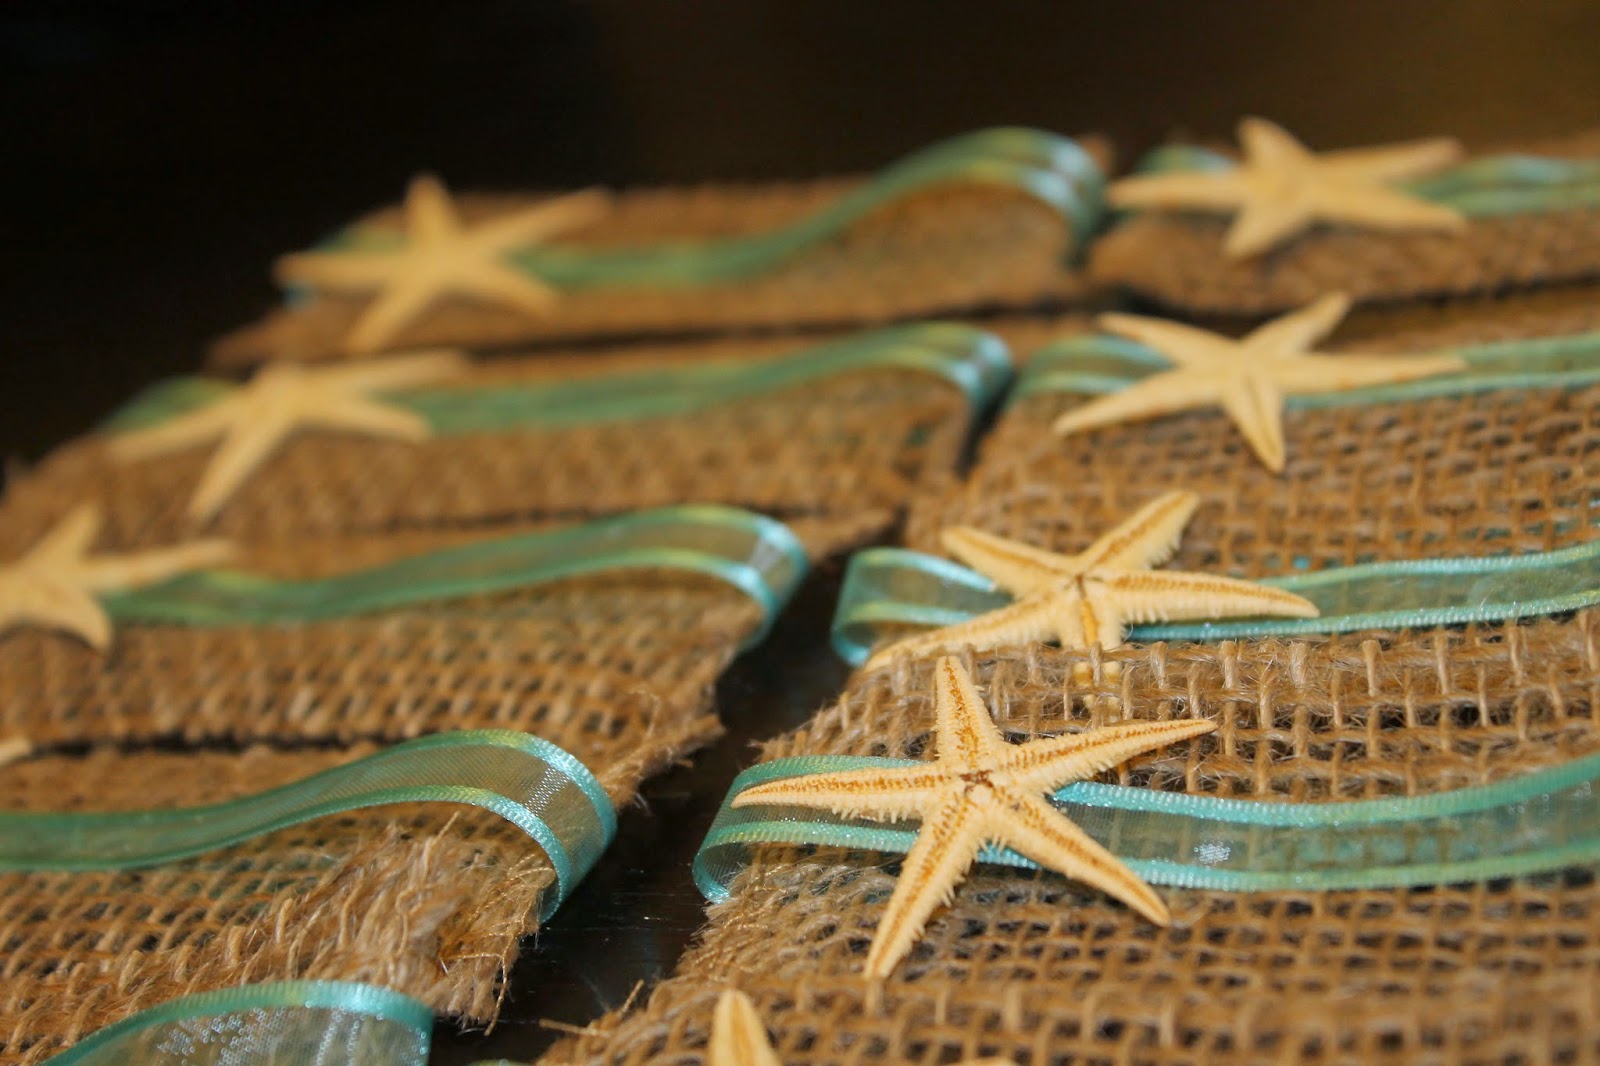
4. For the sleeve, I used a roll of burlap and cut 2″ strips of the material leaving the sewn edges on the sides. I cut 12″ long ribbon and used real Starfish that are about 1.5-2″ in diameter.
{Para la portada, utilicé tela de sace y recorté tiras de 2″ de alto dejando los bordes cocidos a los lados. Recortas tiras de 12″ de largo de cinta y usé estrellas de mar reales de 1.5-2″ de diámetro}
5. Glue the ribbon to the burlap using a hot glue gun or Glass, Metal & More glue (dries clear); I made 2 dots on each side and place in the center points. Glue the starfish to the ribbon, try to center it so that no ends are sticking out and it can fit in the envelope.
{Adhiera la cinta a la tela utilizando pega caliente o pega Glass, Metal & More (seca claro) haciendo 2 puntos a cada lado, centralizando la cinta. Adhiera la estrella de mar a la cinta, centralizado tambien para asegurarse que no sobresalga y la tarjeta quepa en el sobre.}
6. In order for the sleeve to stay in place, glue 2 dots on each side of the card and the wrap the ribbon around the back of the card, gluing both ends to each other. The wet glue should stick to the card as well.
Let dry for 24 hrs.
{Para asegurar que la portada se quede en su lugar durante el tránsito del correo, coloque 2 puntos de pega a ambos lados de la parte superior de la tarjeta. Luego envuelva la cinta uniendo ambas estremidades y pegando a la parte de atras de la tarjeta. Permita 24 horas para que se seque.}
RSVP Cards
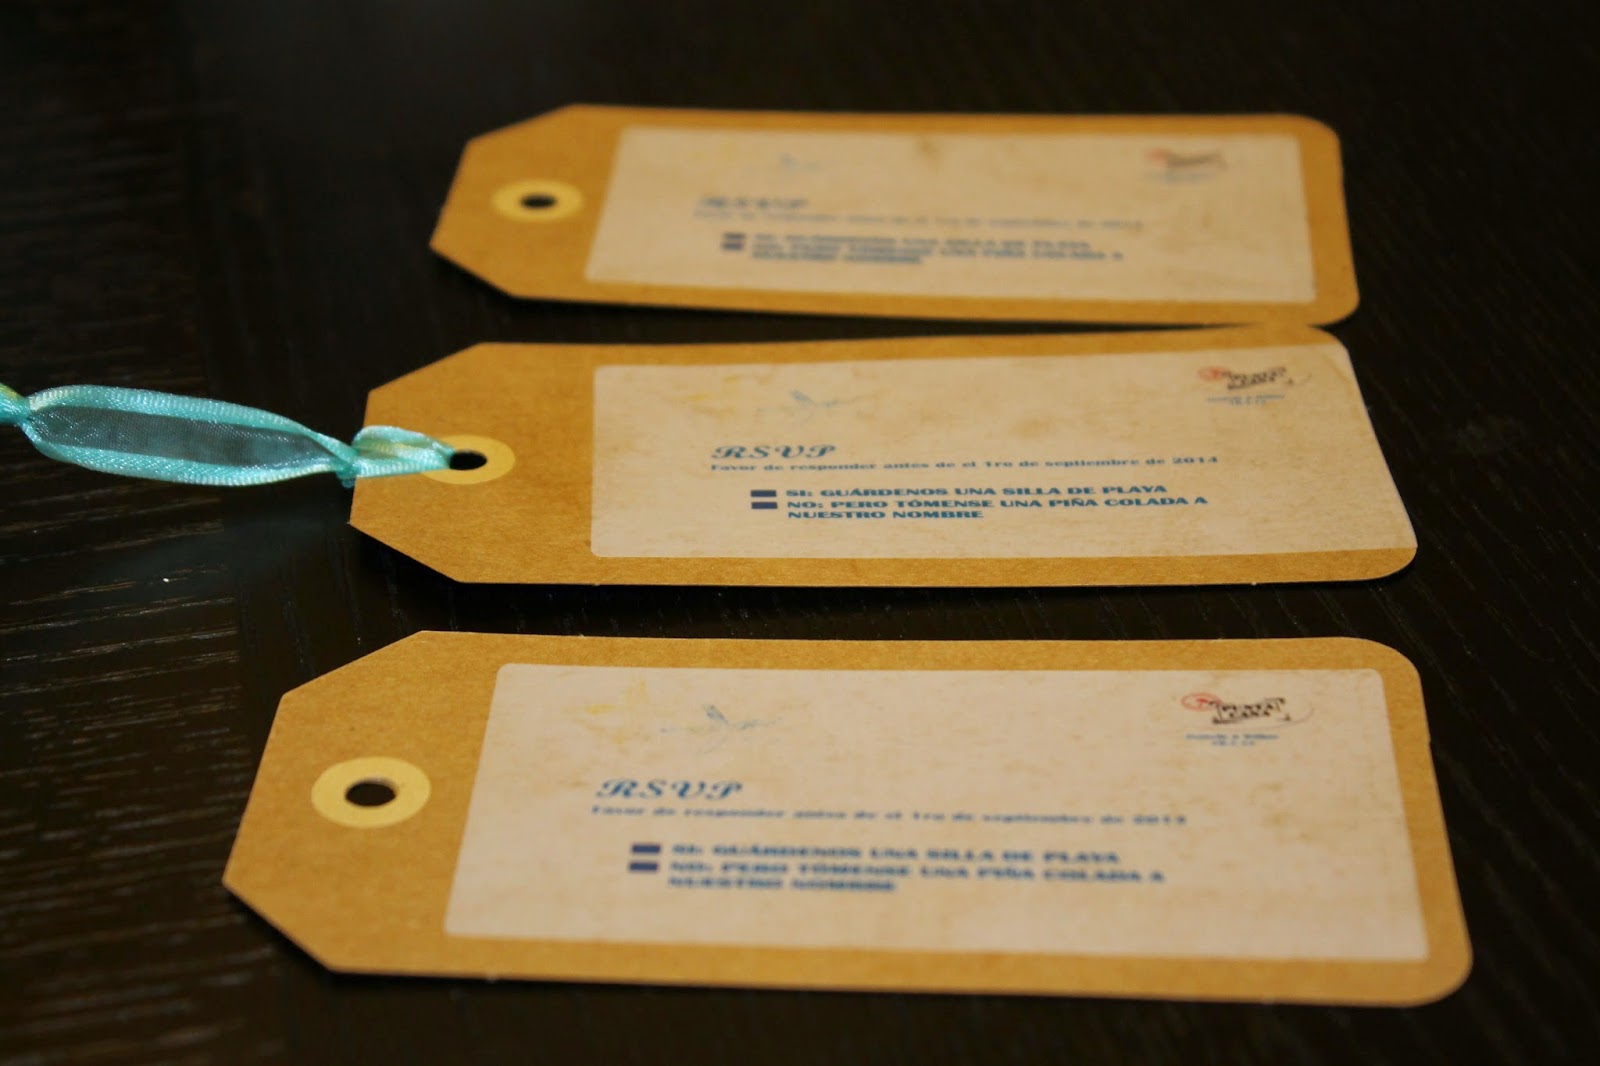
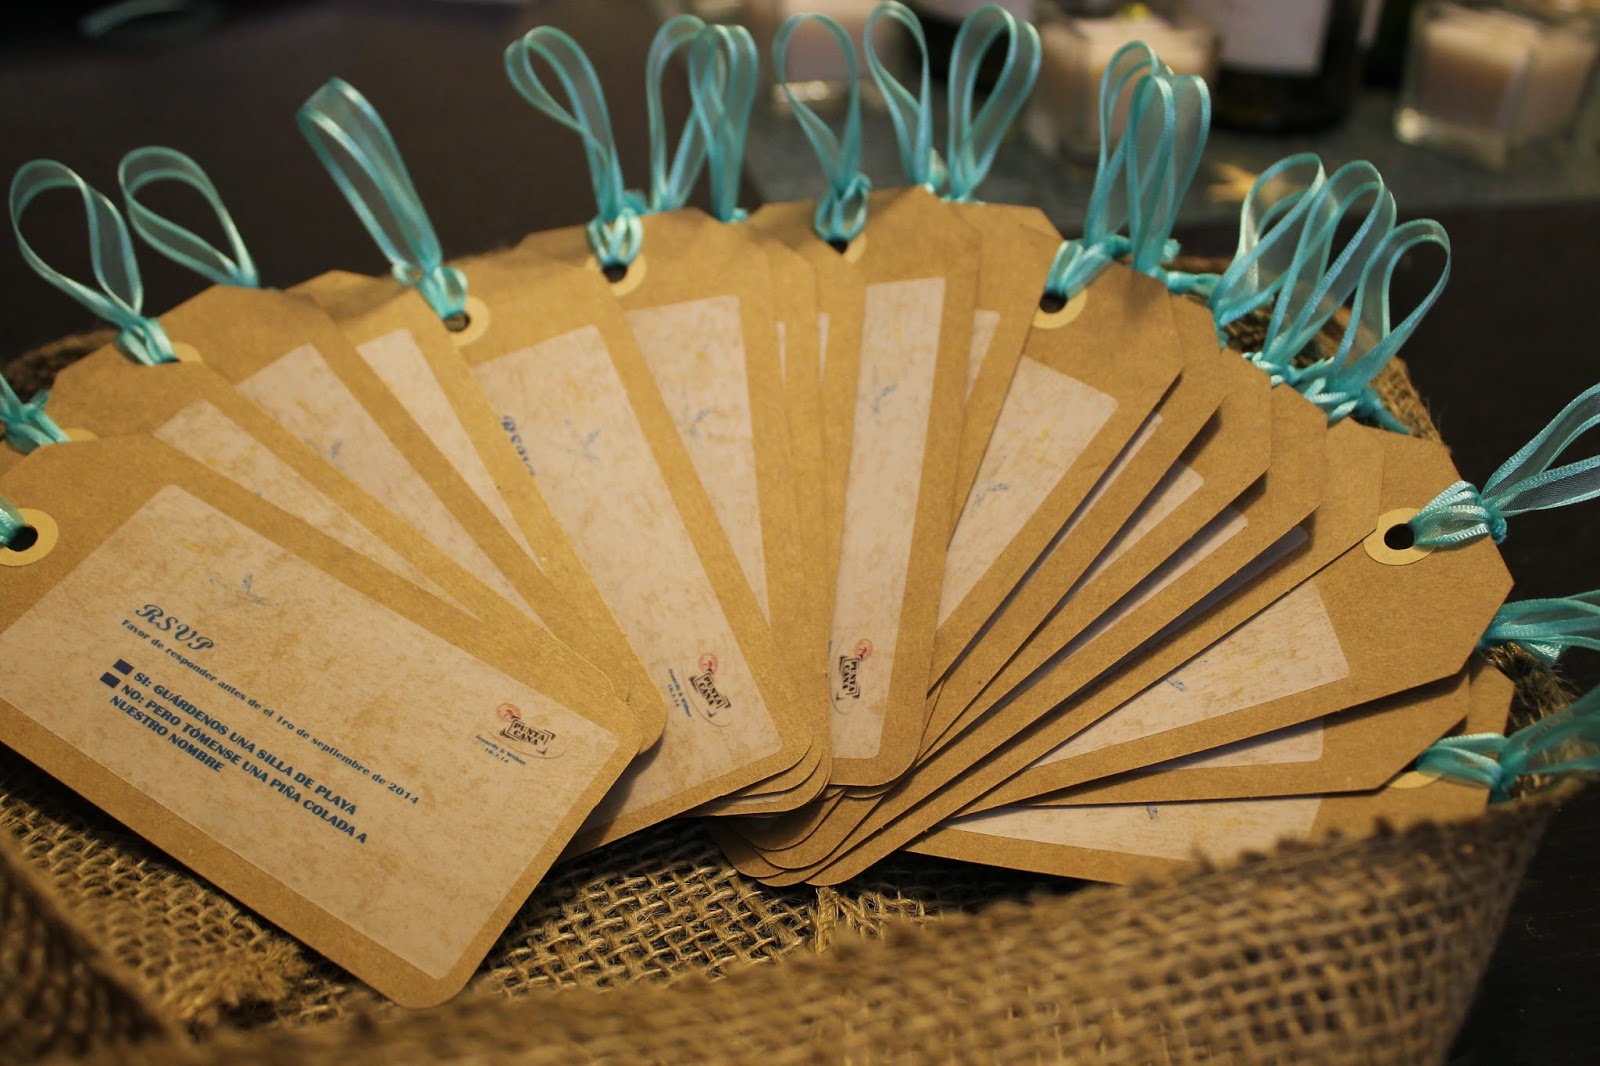
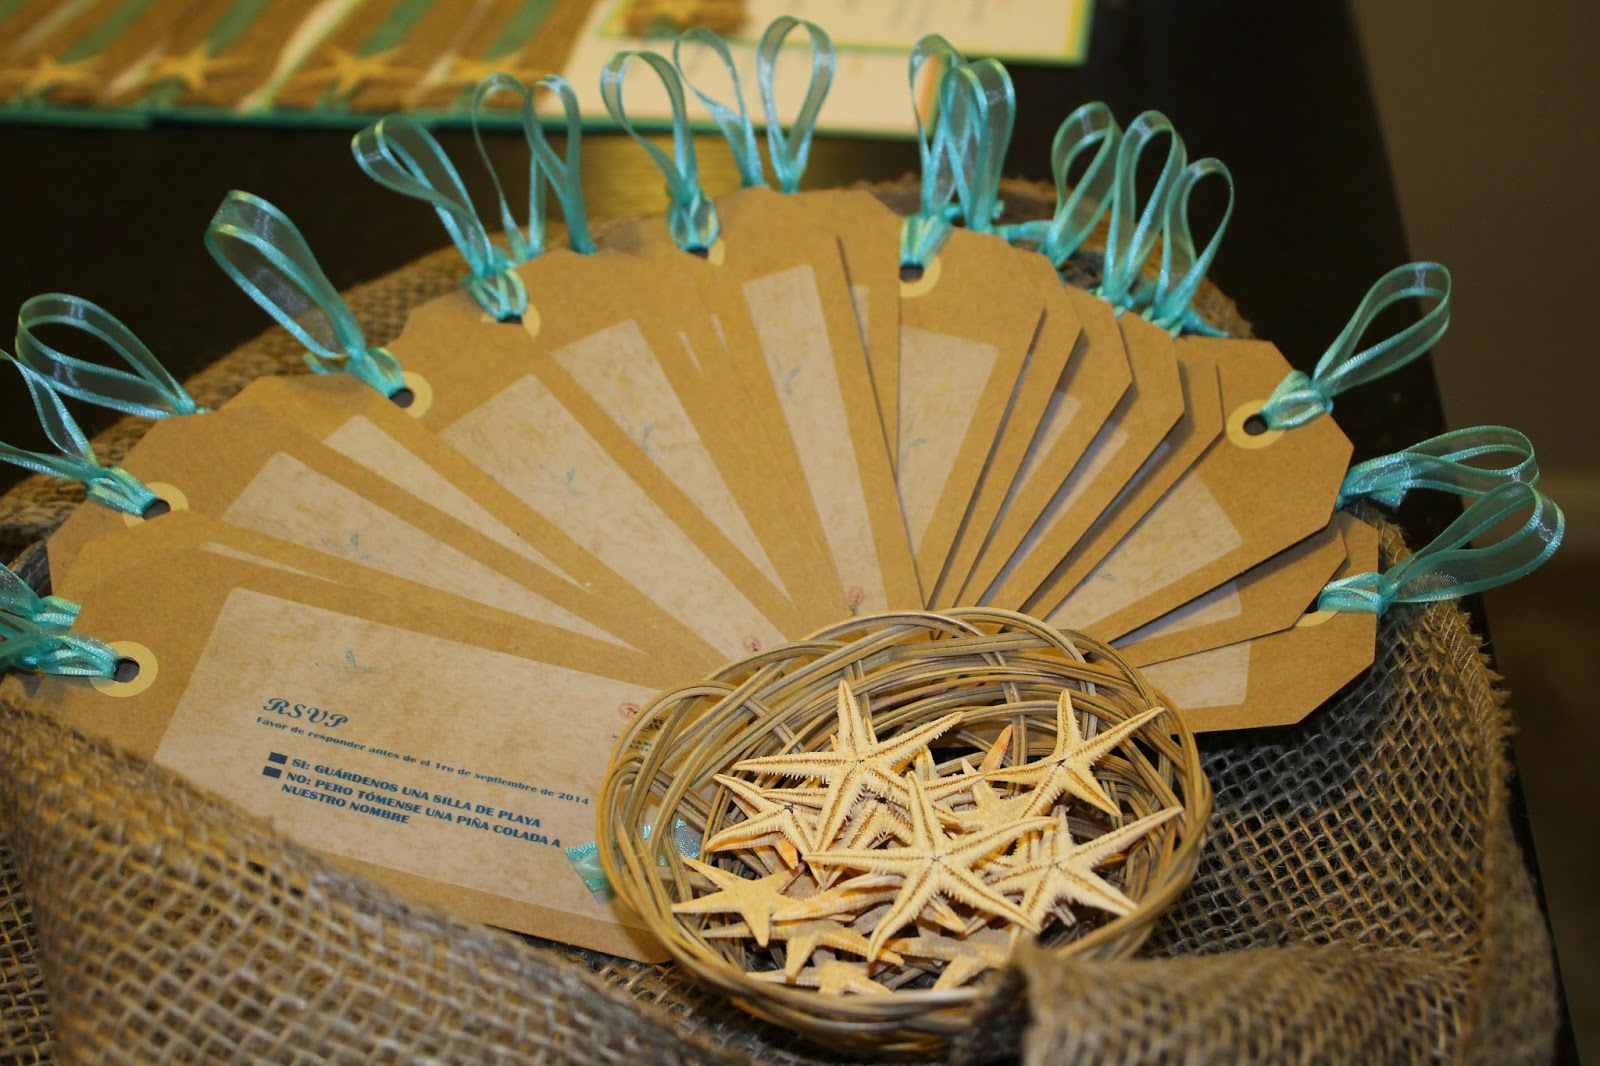
1. These RSVP cards are made to resemble luggage tags. I had the Office Max rep print out clear labels with a light starfish design and a stamp of the location and the date of the wedding. They helped me by using Microsoft Publisher to ensure they fit the labels just right. I found these tags made from recycled material and placed the labels on them. I looped some of the same ribbon used on the invitation around it and that’s it.
{Estas tarjetas de RSVP se hicieron con etiquetas de equipaje en mente. El representante de Office Max me ayudó a imprimir etiquetas transparentes con un diseño de estrellas de mar y una estampa del lugar a donde viajaremos con la fecha de la boda. Ellos me ayudaron utilizando el programa de Microsoft Publisher. Encontré estas etiquetas de material reciclado y simplemente pegué los sellos impresos y le coloqué la misma cinta de la invitación.}
This can be a fun activity you can do with your bridesmaids or fiancé (if they’re up to the task). The best part is that you can save a ton of money and your invitations are going to be very unique. I hope this helps aleviate some of the stress a wedding can cause. I promised myself I’d have a stress free time during the planning and so far it’s been that way. I’m so excited to continue to share more of the wedding process with you all. Stay tuned!
Esto puede ser una actividad divertida para hacer con sus damas o su prometid@ (si se anima). La mejor parte es que ahorrarás mucho dinero y tus invitaciones van a ser bien únicas. Espero que esto les ayude a aliviar un poco del estrés que pueda causar la planificación de su boda. Yo me prometí tener una boda libre de estrés y hasta el momento, así ha sido. Estoy tan emocionada por seguir compartiendo mi proceso de boda con ustedes. Pendiente, que vendrá mucho más!